I’m not talking about the dead pasteurized product often found on supermarket shelves. These commercially available products usually have been heated causing the healthful enzymes to be destroyed. Always look for raw/unpasteurized on the label or make your own. Raw cultured vegetables are abundant in enzymes and lactobacillus bacteria which aid the pancreas and intestines in digestion by breaking down sugars and starches and preserving the bodies naturally produced enzymes.
Sauerkraut consists primarily of cabbage, which is the most often fermented vegetable because it’s surface contains high amounts of lactic acid bacteria. Red cabbage is higher in phytonutrients than green cabbage due to its concentration of anthocyanin polyphenols, which are said to be antioxidant and anti-inflammatory. Fermented cabbage is high in vitamin K and C as well as manganese, folate, B6 and potassium.
Kimchi, which is also largely comprised of cabbage, contains other vegetables as well. A traditional Korean side-dish, it is very spicy and usually contains daikon radish, red chili peppers, garlic, ginger and scallions. Sometimes fish is added, so it is best to always ask your server if it is vegan when eating out.
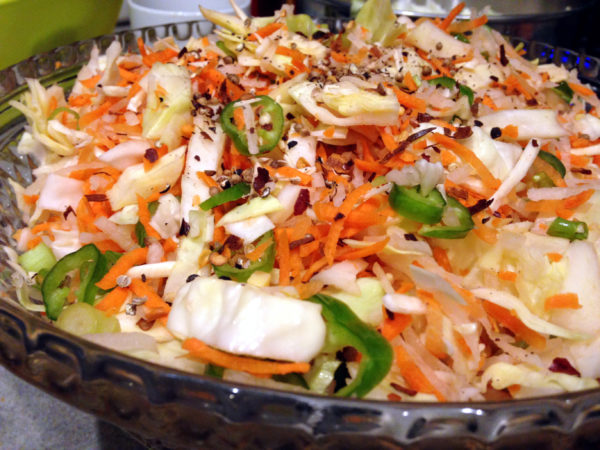
Here I have made a kimchi using primarily green cabbage and daikon radish. I’ve added some carrots, horseradish, ginger, jalapeno pepper, green onions, chili pepper flakes, coriander seed, and peppercorn.
Ferments are not limited to making sauerkraut and kimchi though, nor are they limited to only using just vegetables. An almost endless selection of fruits and spices can be used. A variety of ferments can be made by simply adding other fruits and vegetables, salt, and spices to leftover brine from a previous fermentation. Ferments with less salt may develop surface mold, which is harmless and can be skimmed off. Some people omit the salt and include vegetables that are naturally high in sodium, such as celery and seaweeds.
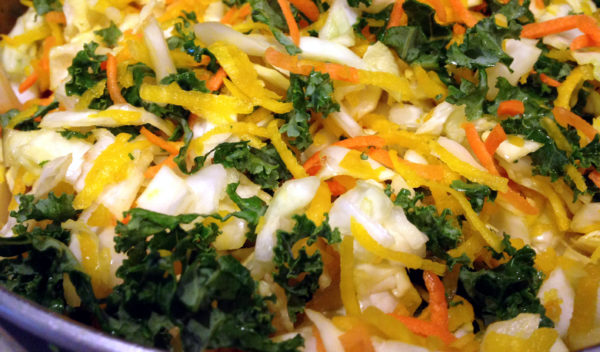
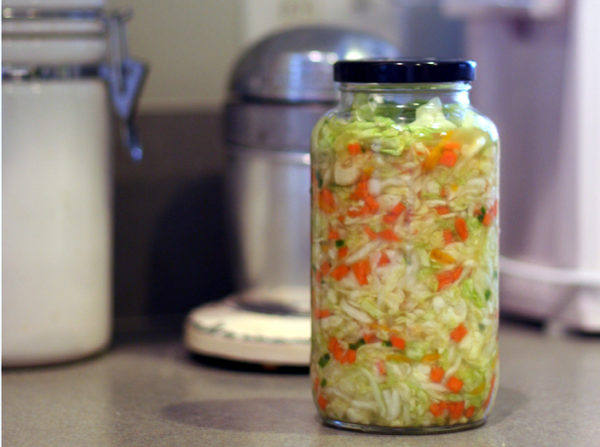
Here I have combined green cabbage with golden beets, kale, and carrots.
To begin preparing your own cultured vegetables you’ll need the following:
- Clean hands
- A large bowl for mixing your ingredients
- A food processor, grater, or sharp knife
- Sea salt (about 1.5 – 2 tsp. per pound of vegetables)
- A selection of vegetables
- Brine from a previous ferment (optional)
- Glass or ceramic container/s of cylindrical shape
Start by chopping, grating, or shredding your vegetables into small pieces. The finer the size, the more liquid will be produced.
Place all your vegetable pieces into a bowl. Add Salt then massage the vegetable mixture to release the juices. Add brine from a previous ferment if you would like to jumpstart the fermentation process, but this is not necessary.
Tightly pack your vegetables into your container by pressing them down so that the juices rise to the top. The vegetables should be completely submerged in the liquid. Any vegetables sticking out of the liquid may develop mold. You can top them off with a larger piece of cabbage leaf to help keep them pressed down. If using a crock you can weight them down with a small plate. If you need to, you can add a little filtered water.
Place the lid on top, and keep them in a cool dark place out of direct sunlight. Check daily and you will see the liquid begin to rise as gas bubbles are produced. Some spillover may occur. If you are using jars, place them on a tray. I loosen the lids to let the gas escape when they need “burping.” There is some spillover, but by placing the jars in a tray, cleanup is easy.
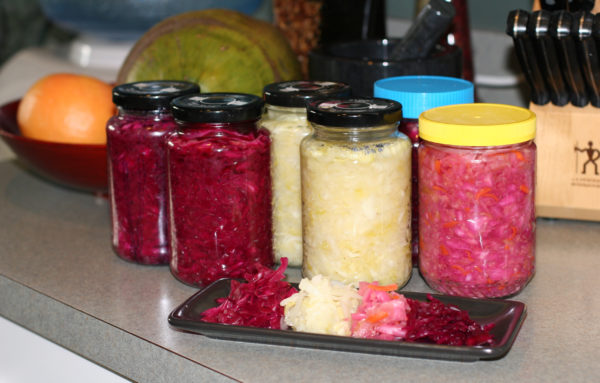
Although traditionally vegetables have been fermented in large ceramic crocks, these are not necessary. Here I fermented vegetables right in the glass jars they were to be stored in.
After about four days, begin tasting to see if it has reach the level of acidity you prefer. Some people like young ferments where vegetables are still crisp and mildly acidic. Others prefer when the vegetables become very soft and the brine is quite sour, which indicates a greater presence of lactic acid bacteria. Once you have the flavor and texture you like, place them in the fridge where they can be stored for a year or more. They will continue to ferment, but due to the cold temperatures the rate of fermentation will be greatly reduced. Eat as a condiment, or make it a main salad ingredient. I especially like adding them to spring rolls and in grain dishes.